During our work and private lives, it may often be necessary to view images taken with a cell phone or camera on a map to see exactly where the photos were taken.
Why do you want to view pictures on a map?
We all know that. We returned from a beautiful holiday in an interesting place, which we enjoyed perfectly. During the holidays, we took a lot of pictures either with a camera or just a mobile phone. Now, after some time after returning to the reality of everyday life, we would like to enjoy the experiences and the beautiful atmosphere of the holiday again. We would like to see again which places we visited during the holidays and what we saw there. All cell phones and most of the cameras today allow so-called geotagging. It means that as you shoot, the pictures are geotagged using GPS information (such as latitude, longitude, and elevation).
But we often need to display on the map not only photos from vacation, but also pictures from field work, which we took during some measurements or various outdoor work. For example, we took hundreds of pictures during the pipeline inspection, but we are unable to remember where the specific photos were taken.
How to view pictures on a map?
For all these cases, there is a simple tool “Geotagged photos to KMZ” that creates for you an interactive photo viewer in Google Earth map from your photos. The tool converts GPS position (geotag) recorded in your photos to the KMZ file and shows the photo in a description popup after clicking the point on a map. It also generates a line of your route – based on timestamps.
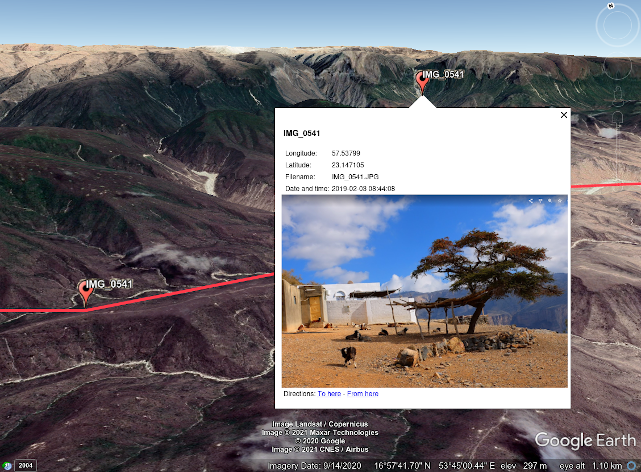
The tool extracts GPS location from metadata of every single photo you upload and creates point markers to a KMZ file. The photo is included in the KMZ file so it is possible to display the photo after clicking at the marker (you must be using Google Earth software). Also a polyline between points is generated – based on the order you were shooting your pictures.
The basic premise to capture a photo with geotag is that the camera has a GPS receiver and allows to write the geotag to photo’s EXIF metadata.
How to view photos in Google Earth in three steps:
- Upload your photos to the Geotagged photos to KMZ tool.
- Adjust some settings like size of the photos or output data format.
- Processing your photos and download the resulting KMZ file, which you can view in Google Earth.
Step 1:
Upload your Geotagged photos having geotag (GPS position tag in EXIF metadata) to the Geotagged photos to KMZ tool. You can either ‘Drag & Drop’ your pictures from local storage into the browser window or simply browse your device and upload your photos in a traditional way.
Step 2:
Then the uploaded data are verified and you can adjust some settings in the next step of the process. You can resize the input photos to a defined percentage of the original size, optionally you can resize the input photos to a defined maximum width and height – in pixels. It is recommended to have a size below 500 pixels. You can also choose to create a KMZ file with embedded images or a separate KML file with an external photo folder. Finally, it is possible to define whether the photos (tags) in KMZ should be arranged in separate folders by date (according to calendar days).
Step 3:
In the last step, you will start processing your photos and after a while you will be able to download the resulting KMZ file, which you can view in Google Earth.